Have you joined Microsoft Build 2020, where Microsoft introduced various exciting news to the world? Among all of the updates, I am especially keen to introduce Azure Static Web Apps, the hosting service for a static website that has been finally announced as Public Preview, and that enables us to create & deploy Vue.js Web application literally within "a few minutes".
Vue.js is made based on the concept of "Progressive Framework", hence we can start writing from very small, and gradually grow them into the enterprise scale. In this post, I would like to introduce the first step to create scalable applications using Vue.js and Azure Static Web Apps.

Creating New Project with Vue CLI
In order to be ready to use Azure Static Web Apps, your application code needs to be on GitHub. First, write some basic code. A shortcut to create the Vue.js project is to use Vue CLI. For example, with Vue CLI, you can configure Router, or TypeScript in the appropriate way.
Let’s get started. Using Terminal, move to the directory where the application will be created to run the command like below:
npm i -g @vue/cli
vue create .
Next, create the project with a frequently-used configuration with the Vue CLI prompt. I choose TypeScript here because I believe TypeScript is going to be major in the Vue.js project. Also, select Router, ESLint, Prettier, and Jest which is majorly used in many projects. For "Use class-style component syntax?,” I suggest selecting "No" since it is no longer mainstream with Vue.3x.
Vue CLI v4.3.1
? Please pick a preset: Manually select features
? Check the features needed for your project: TS, Router, Linter, Unit
? Use class-style component syntax? No
? Use Babel alongside TypeScript (required for modern mode, auto-detected polyfills, transpiling JSX)? No
? Use history mode for router? (Requires proper server setup for index fallback in production) Yes
? Pick a linter / formatter config: Prettier
? Pick additional lint features: Lint on save
? Pick a unit testing solution: Jest
? Where do you prefer placing config for Babel, ESLint, etc.? In dedicated config files
? Save this as a preset for future projects? (y/N) N
After a while, the Vue.js project will be generated. Let’s check if the application runs properly on local.
npm run serve
If the green Vue.js logo on the initial screen shows up, the basic configuration is all set up. You can already run not only TypeScript compile but also unit testing and formatting. The rest is just to add the code for features of your application!
At this point, push codes to GitHub in order to get ready for the deploy to Azure.
Provisioning Azure Static Web Apps
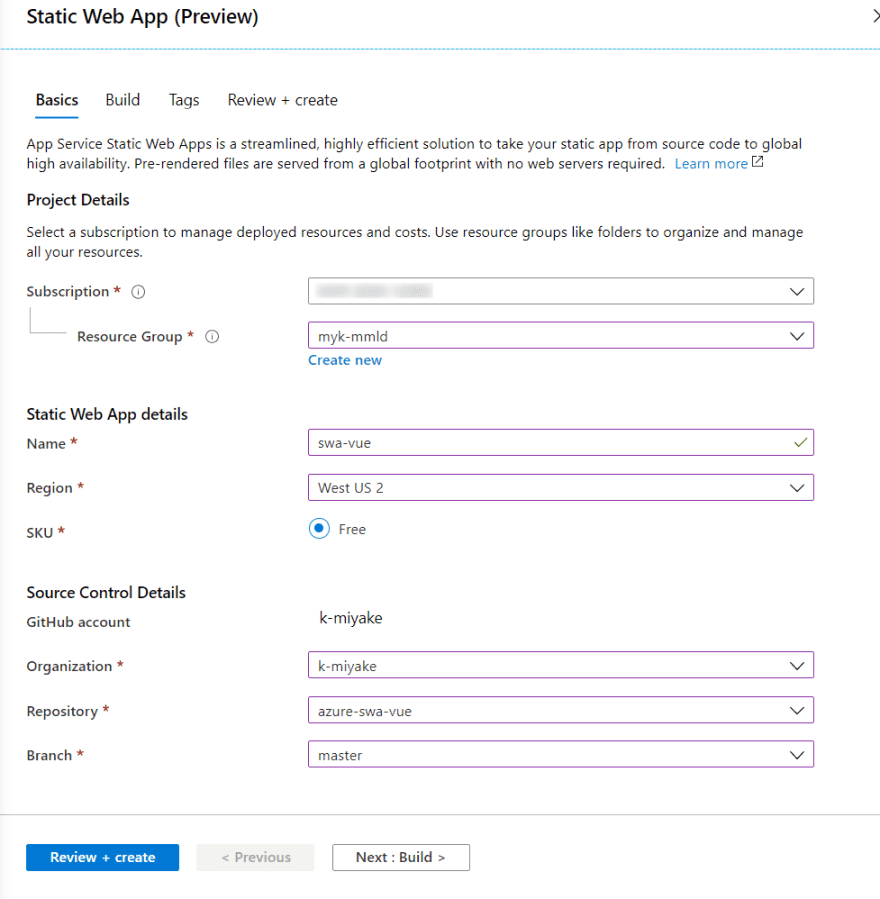
Open the Azure portal and go to "Create a resource", and search "static web apps". Fill in all the necessary information as follows. In this process, you link this resource with the GitHub Repo.
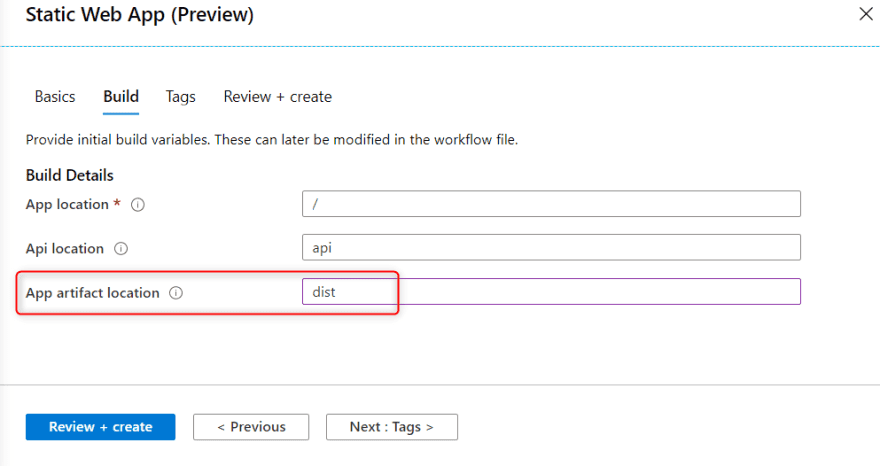
Click "Next:Build", and it takes you to the next step. In this step, type "dist" for "App artifact location". "dist" is a directory that outputs the static files for hosting, such as HTML, CSS, Javascript when we run npm run build (standard build command of Vue CLI).
Click "Review + Create" and wait a few minutes, deployment is complete! You don’t need to configure CI service or write the build script in YAML.
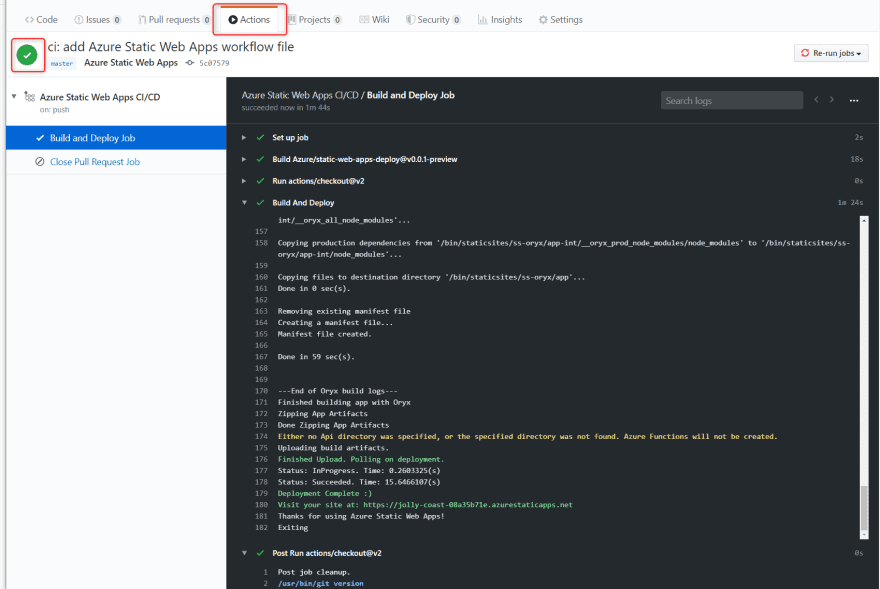
At this point, the build workflow of GitHub Actions runs automatically in the background. To check the build status, you can open the Actions tab in GitHub. If the Icon is green, then the build and deploy are successfully completed.
Now, let’s go back to the Azure portal and click the site URL. You will see the same page published as the application you ran locally.
At this moment, the YAML file is already added to .github/workflows in the GitHub repository, so do not forget to pull them to local.
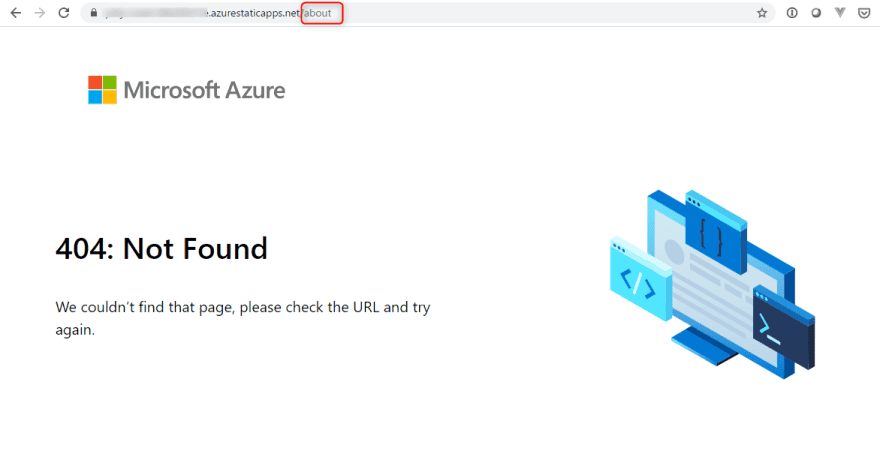
Setting Fallback Routes
We selected "History Mode" when we set up Router with Vue CLI. In the SPA, re-loading a specific page causes 404 if we do not configure anything on the hosting environment.
To enable History Mode in a hosting environment, you need to make the appropriate setting for the environment. In case of hosting Vue.js on Azure Static Web Apps, create routes.json file under public directory like below.
{
  "routes": [
    {
      "route": "/*",
      "serve": "/index.html",
      "statusCode": 200
    }
  ]
}
So, let’s push this change to brunch and create a pull request.
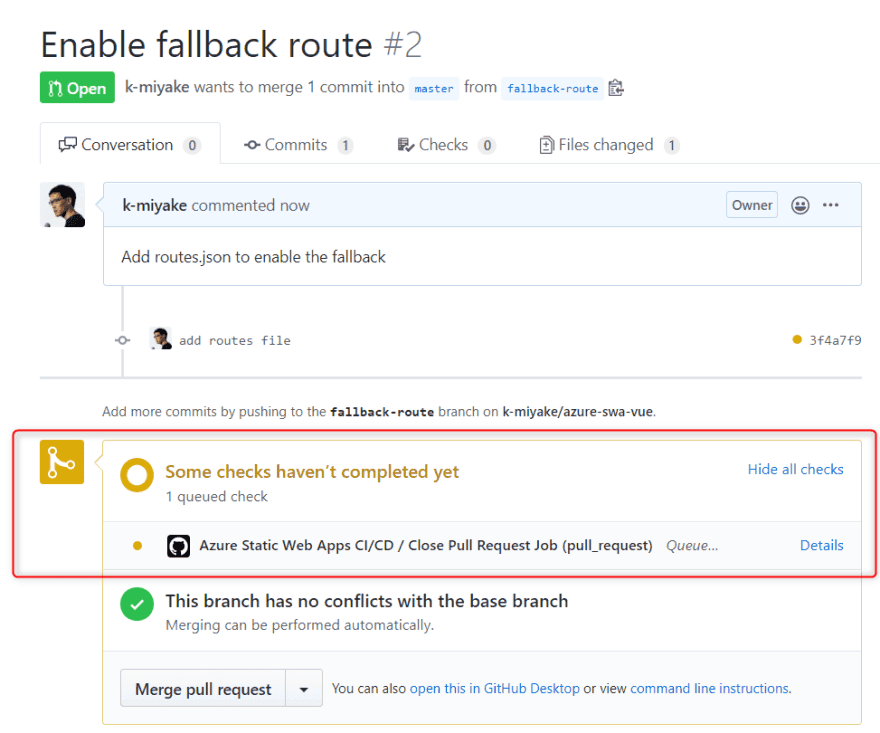
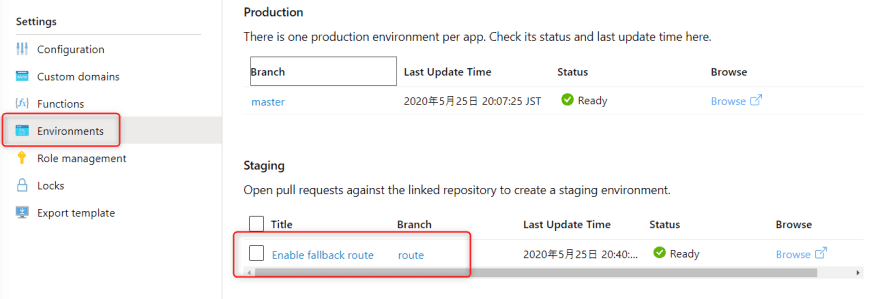
Here, The pull request is triggered and the deployment to Static Web Apps is executed. Once the build process is completed, you can confirm the deployed change under "Environments" in Azure Portal.
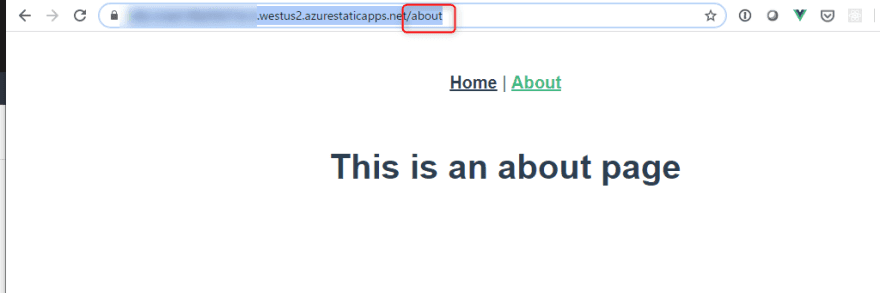
Let’s check the "about" page with which we had a problem earlier. Now, it no longer shows the 404 page after reloading.
All you have to do for the rest is just to merge a pull request and wait for it to be deployed to the "production" environment. When the pull request is closed, the staging environment will be automatically deleted.
Final Words
I hope you experienced how easy it is to host a scalable Vue.js application with Azure. Azure Static Web Apps is currently available to Public Preview, for free! Who wouldn’t try it?